Welcome to my Blog!

Hi there, nice to have you visiting! I'm Heidi and this is the blog for Heidi Bears. Here is where I post all the happenings in my work and daily life. Here and there you'll find info on things that have caught my attention as well as the odd tutorial. I hope you enjoy your visits. I love to have feedback, so leave me a comment!

Friday, May 28, 2010

Log Cabin Crochet Block Tutorial...and a Giveaway!

Hi dear friends,

Today's post is really short and perhaps not as well photographed as I would like...
we have all been struck down with the dreaded lergy...headaches, coughing, noses running...it's not a pretty sight! So, as much as I wanted to do a nice clean, (properly exposed) tutorial, I sat on my bed and crocheted a quick easy one...

In addition, I am doing a giveaway for all my followers! Thank you so much to everyone who visits me here...although I may not manage to respond to every comment, I really appreciate you dropping in :) As a token of my appreciation, I am giving away the following items:

A gorgeous Bear making kit, complete with mohair and all the bits and pieces you need to make this little person (you just need hands ,needle and sewing thread...or alternatively, a sewing machine and thread) :)
Two beautiful Susan Bates crochet hooks (sizes 2.75mm and 3.75mm), stunningly decorated by the talented Jenn Edwards, in floral polymer clay...
A big skein of hand-dyed pink and green 100% merino wool yarn

So if you are already a follower, you don't need to do anything...if you do follow by the time I do the random draw (Sunday 18hoo South African time), you will automatically be entered into the draw :)

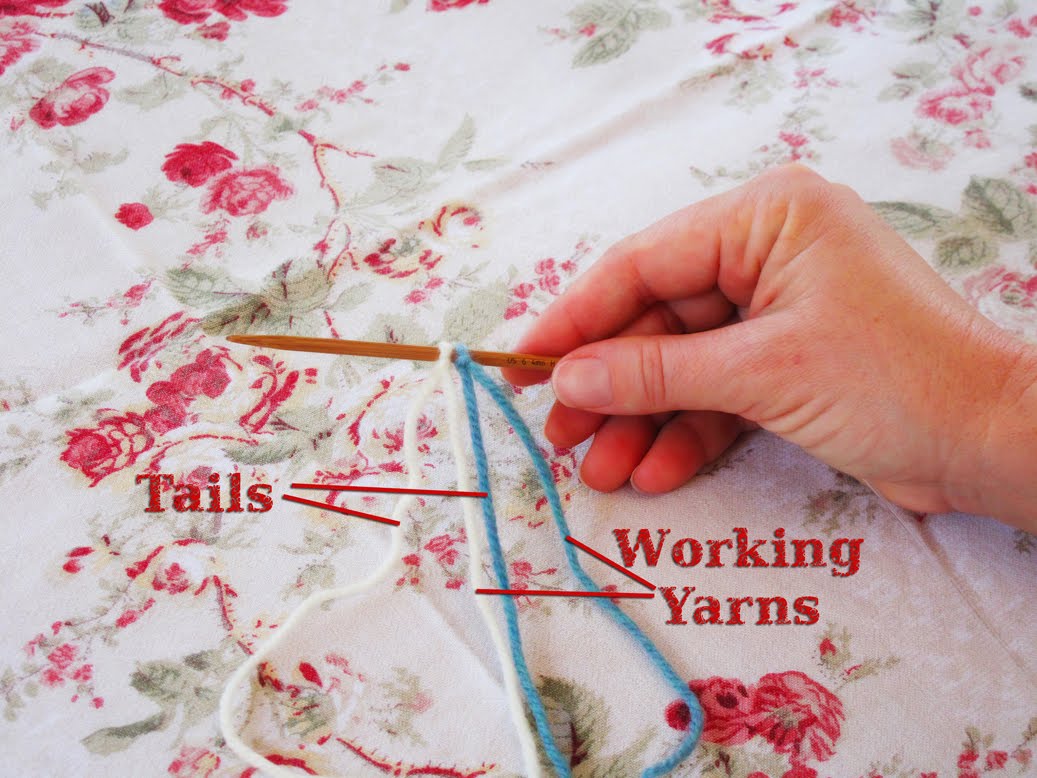
Now for the brief tutorial. I am making a little block for a blanket for a small boy who recently lost his mommy, and wanted to do something traditional, but in boy colours, so I made a very simple log cabin block in blues and greens...


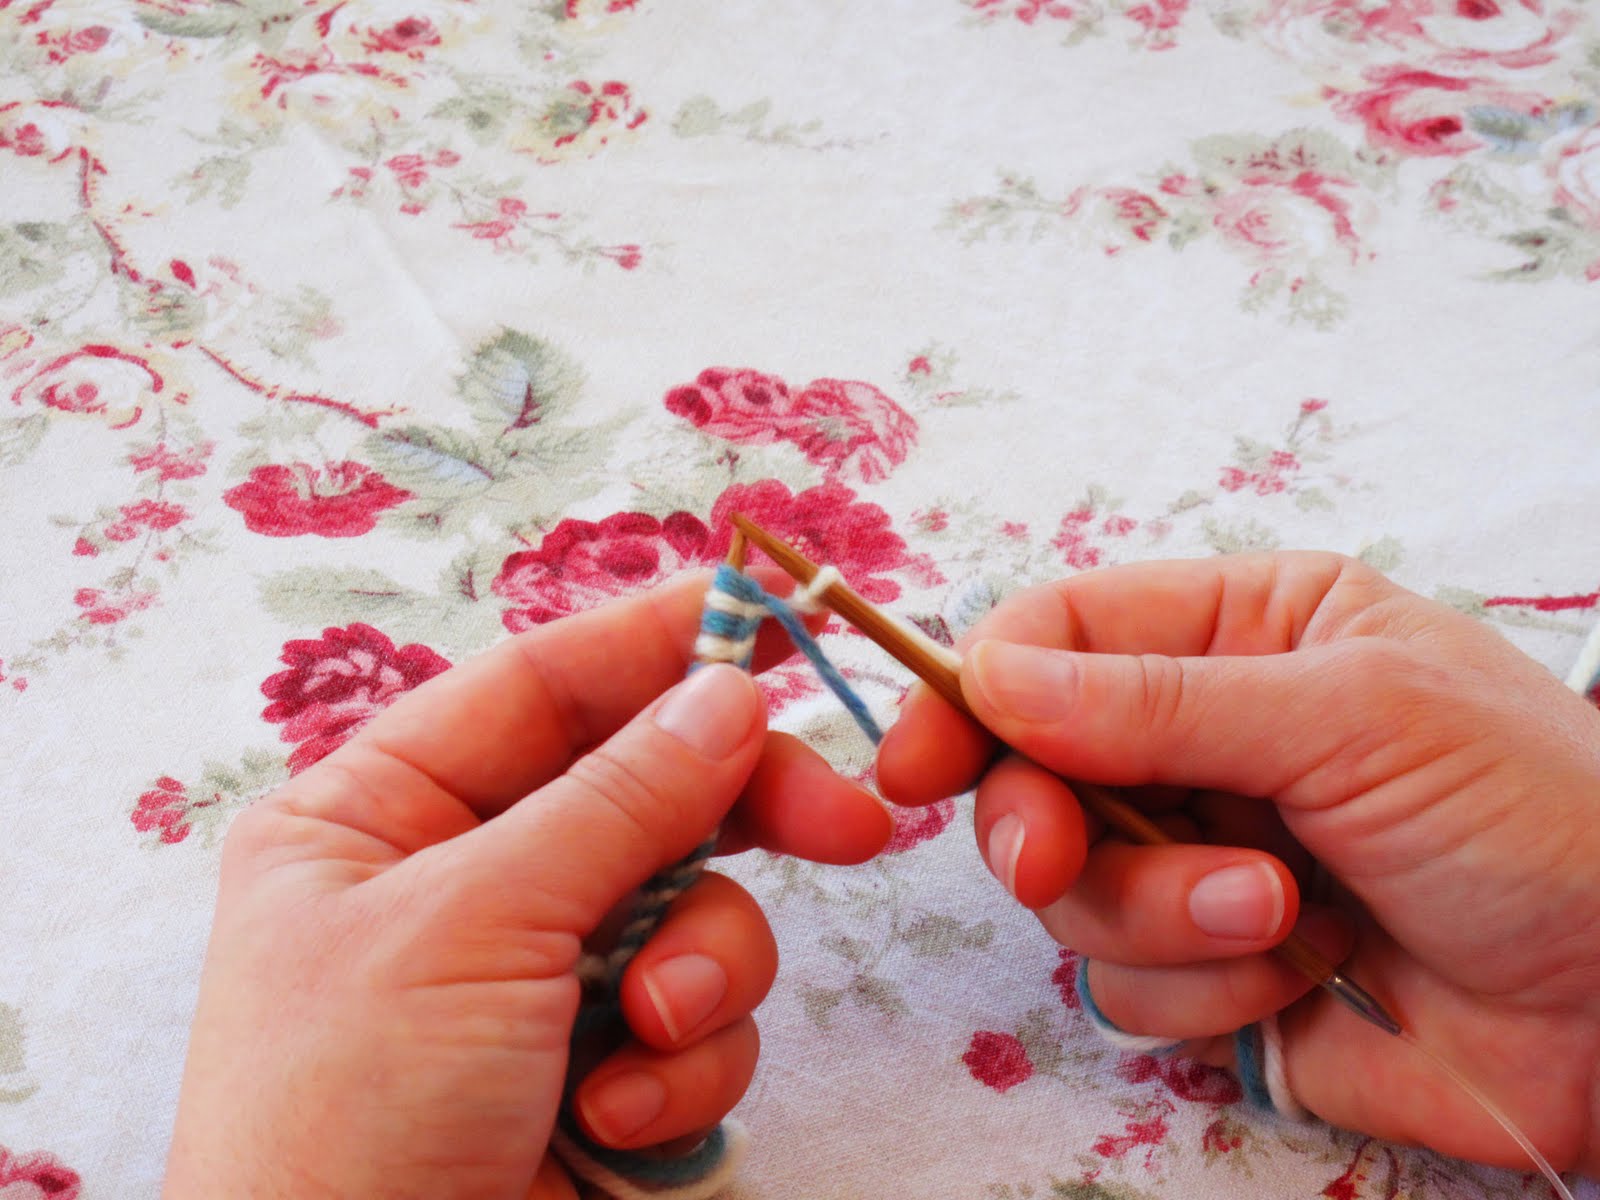
Firstly, choose the colours you like. Try to keep the yarn weights similar or your block will be wonky.
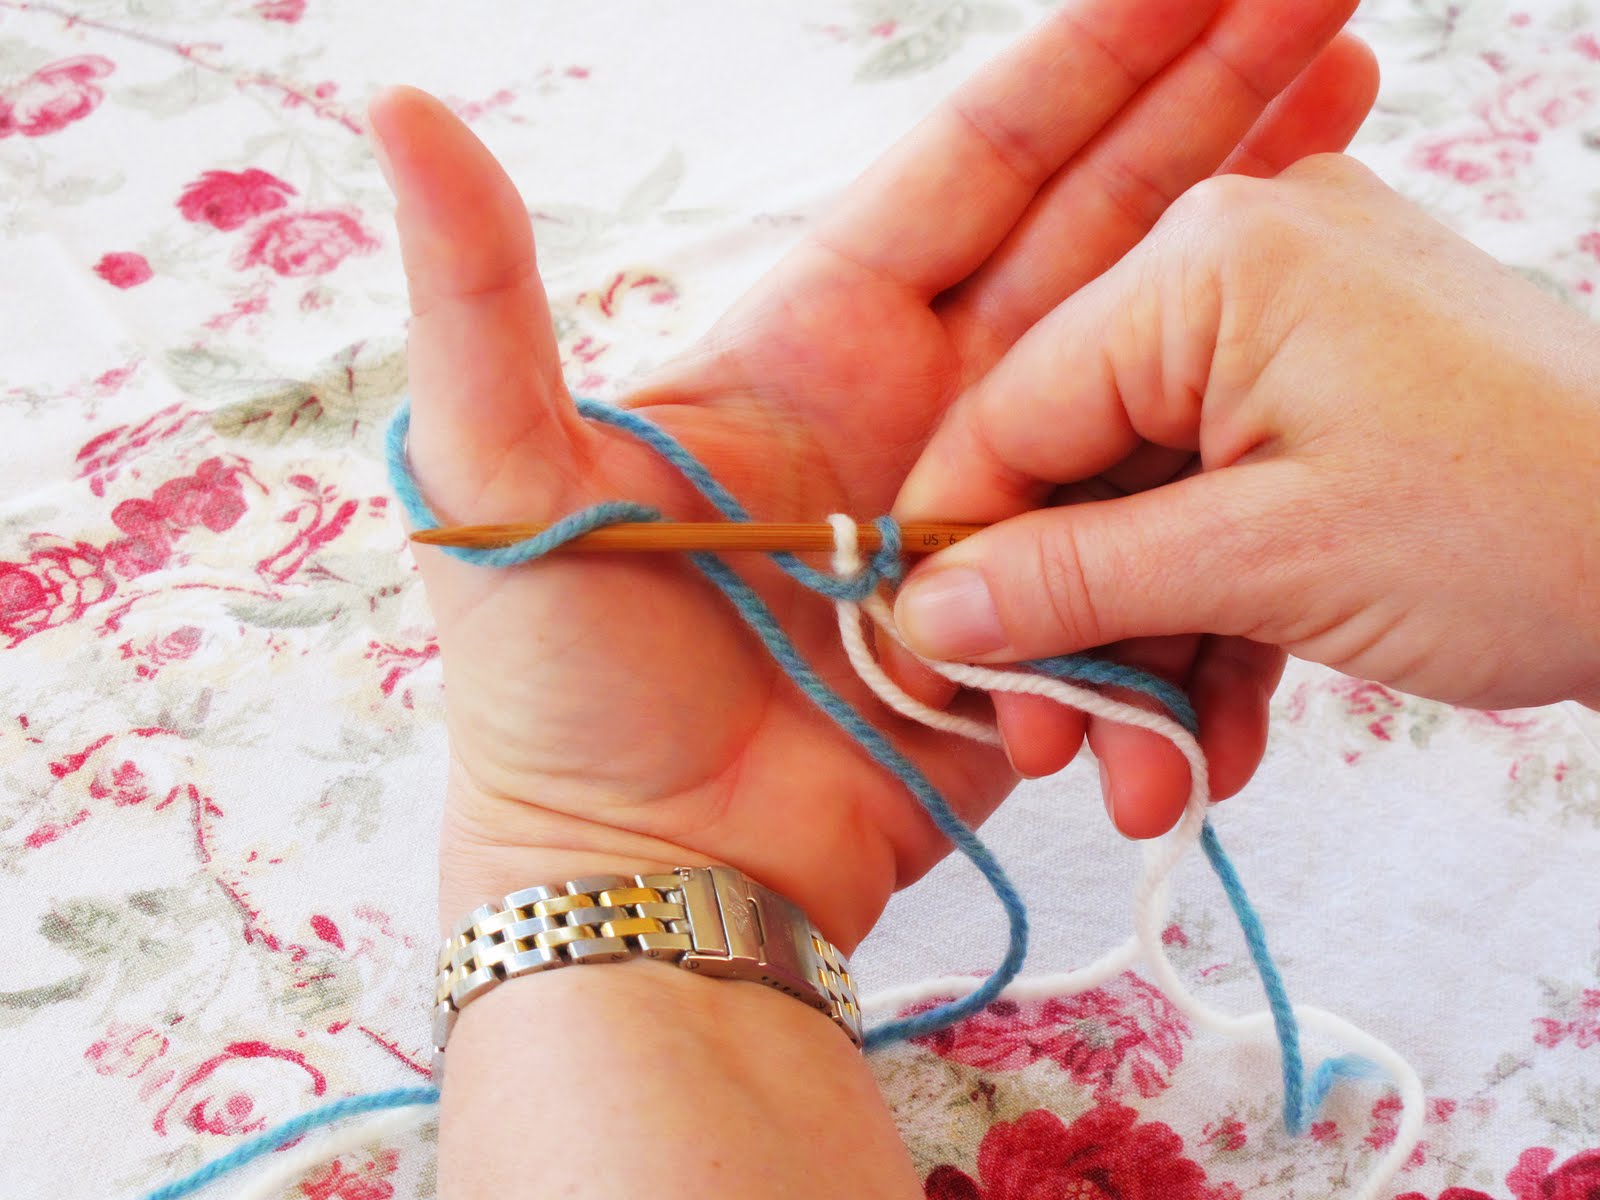
Chain as many stitches as you would like you central square to be.

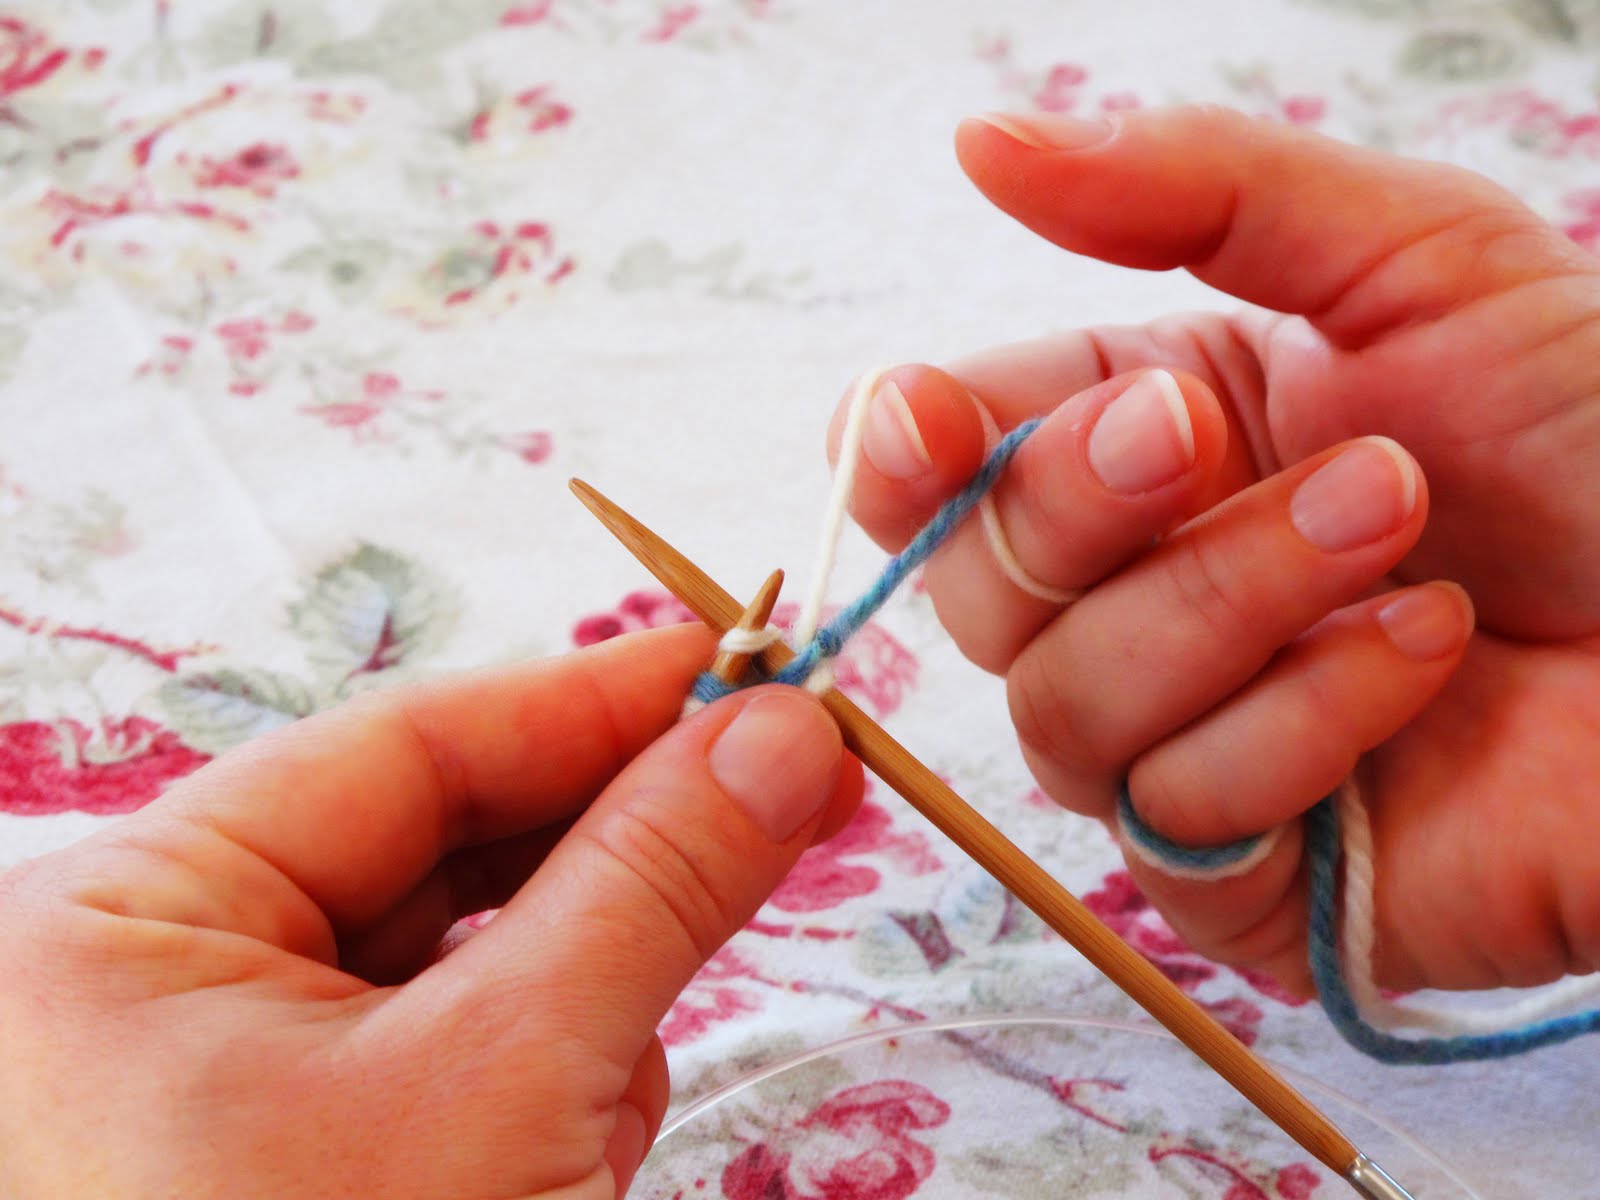
Skip one stitch and start to do Sc stitches into each chain. When you get to the first chain you made, crochet the last Sc on this side of the work, and turn your work around.


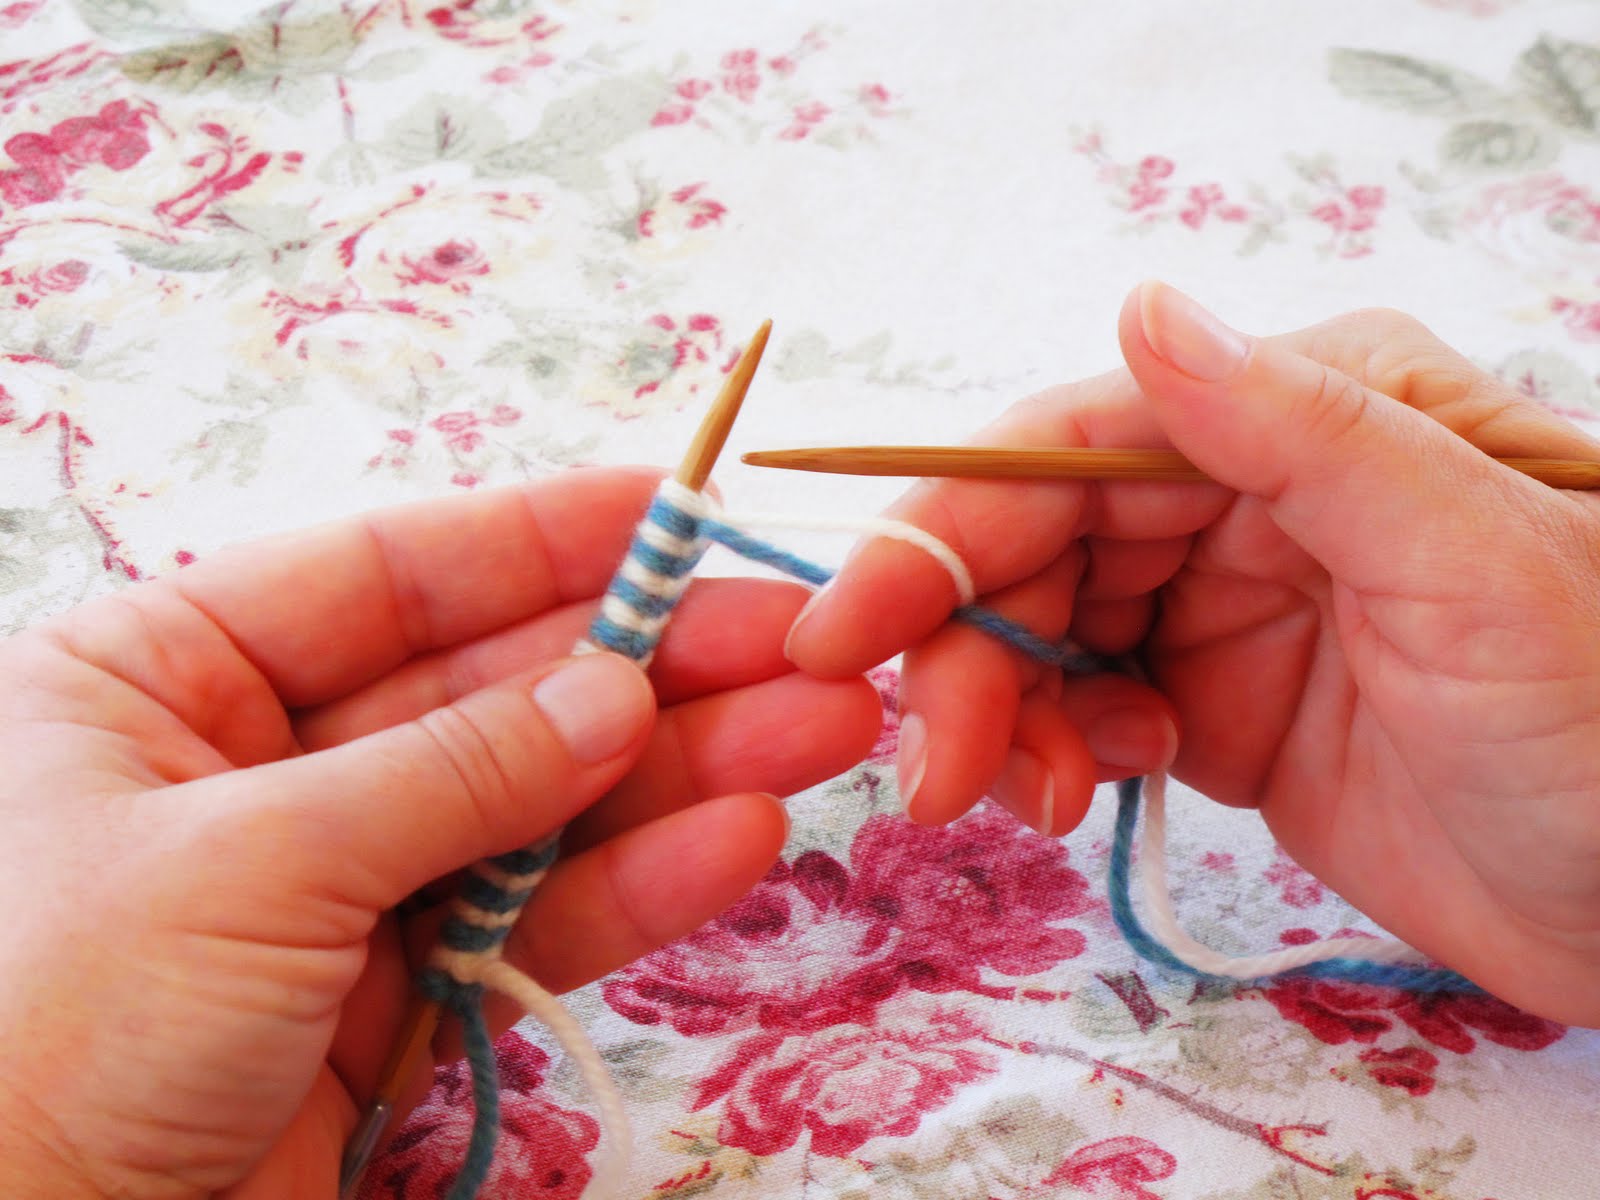
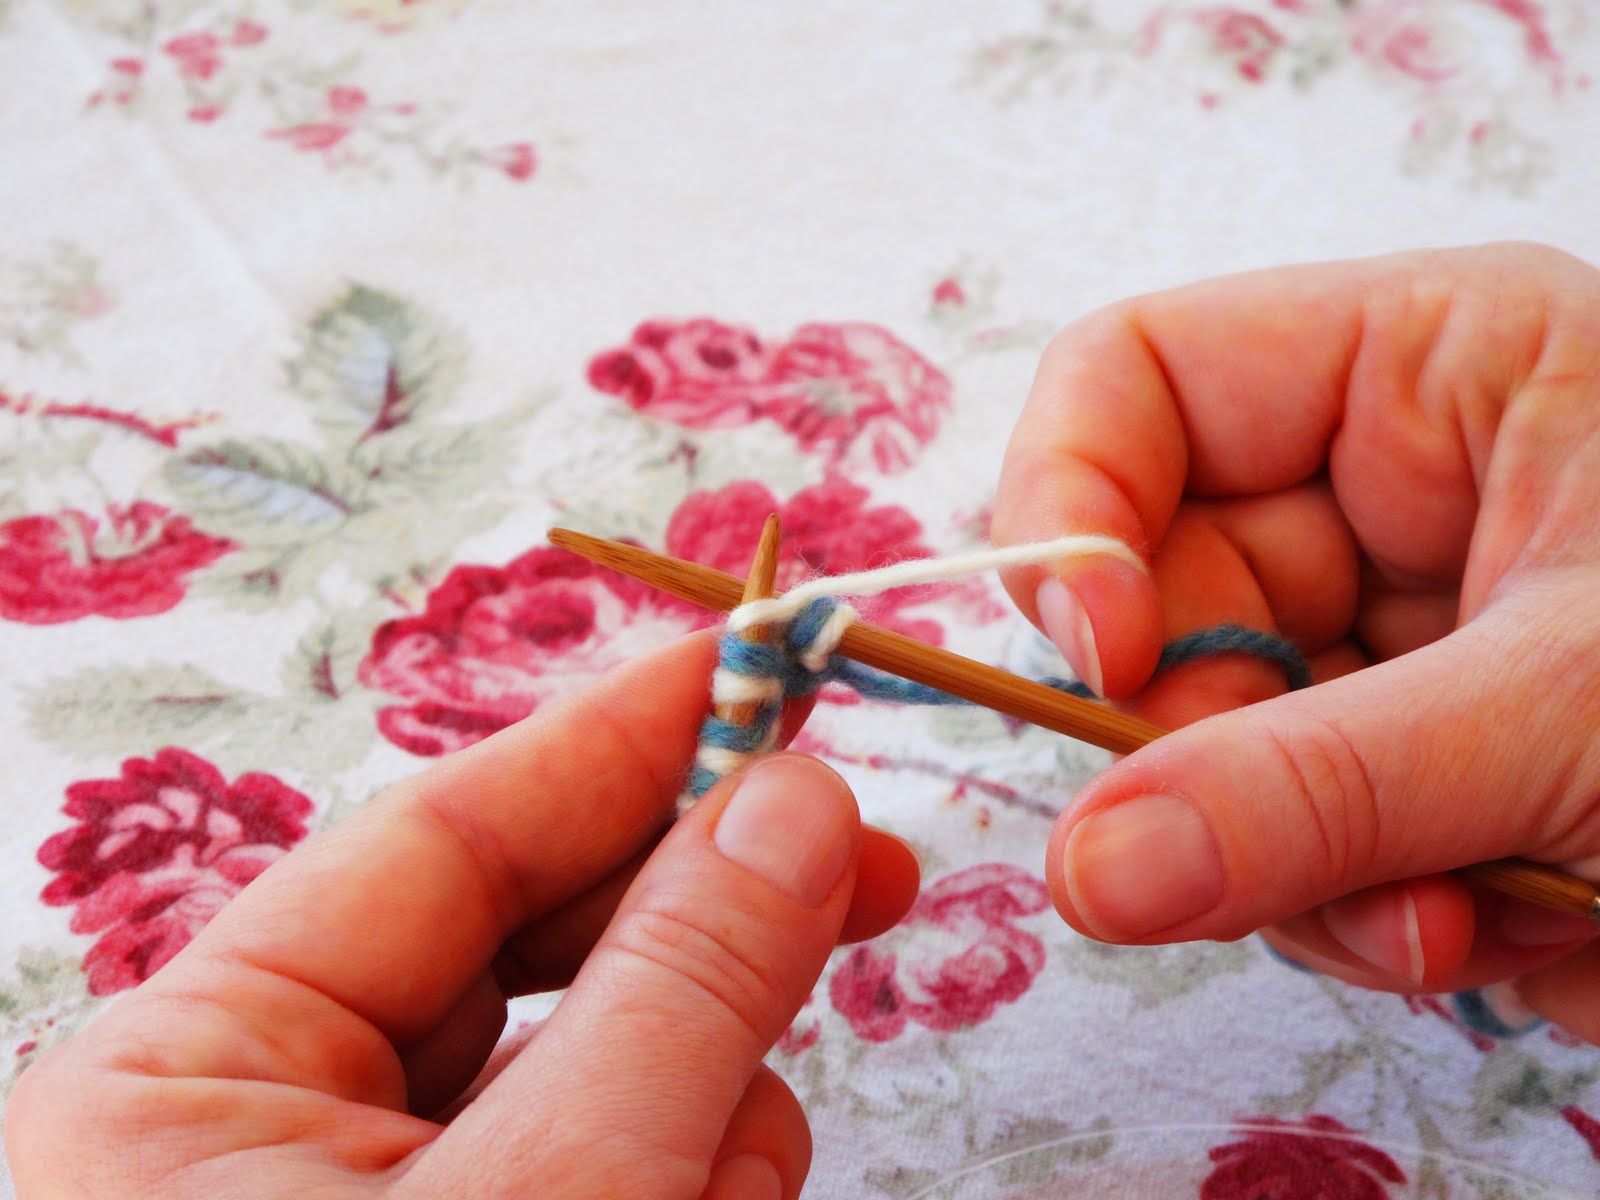
End of first row reached. Once you have turned your work, ch 1, then start to Sc into each loop of the stitches made in row 1. Keep repeating the rows until you have a square shaped piece of crochet.


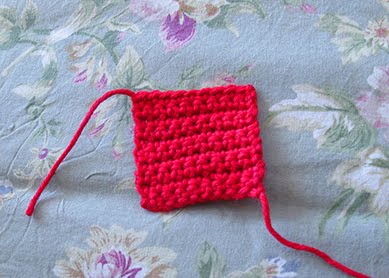
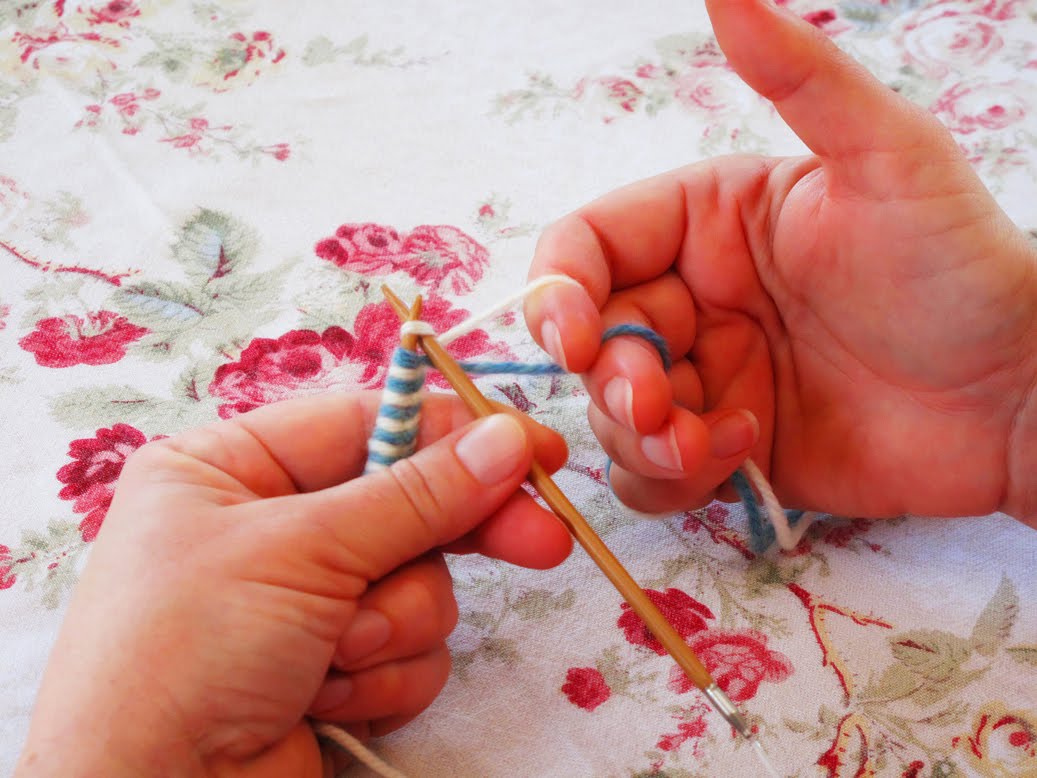
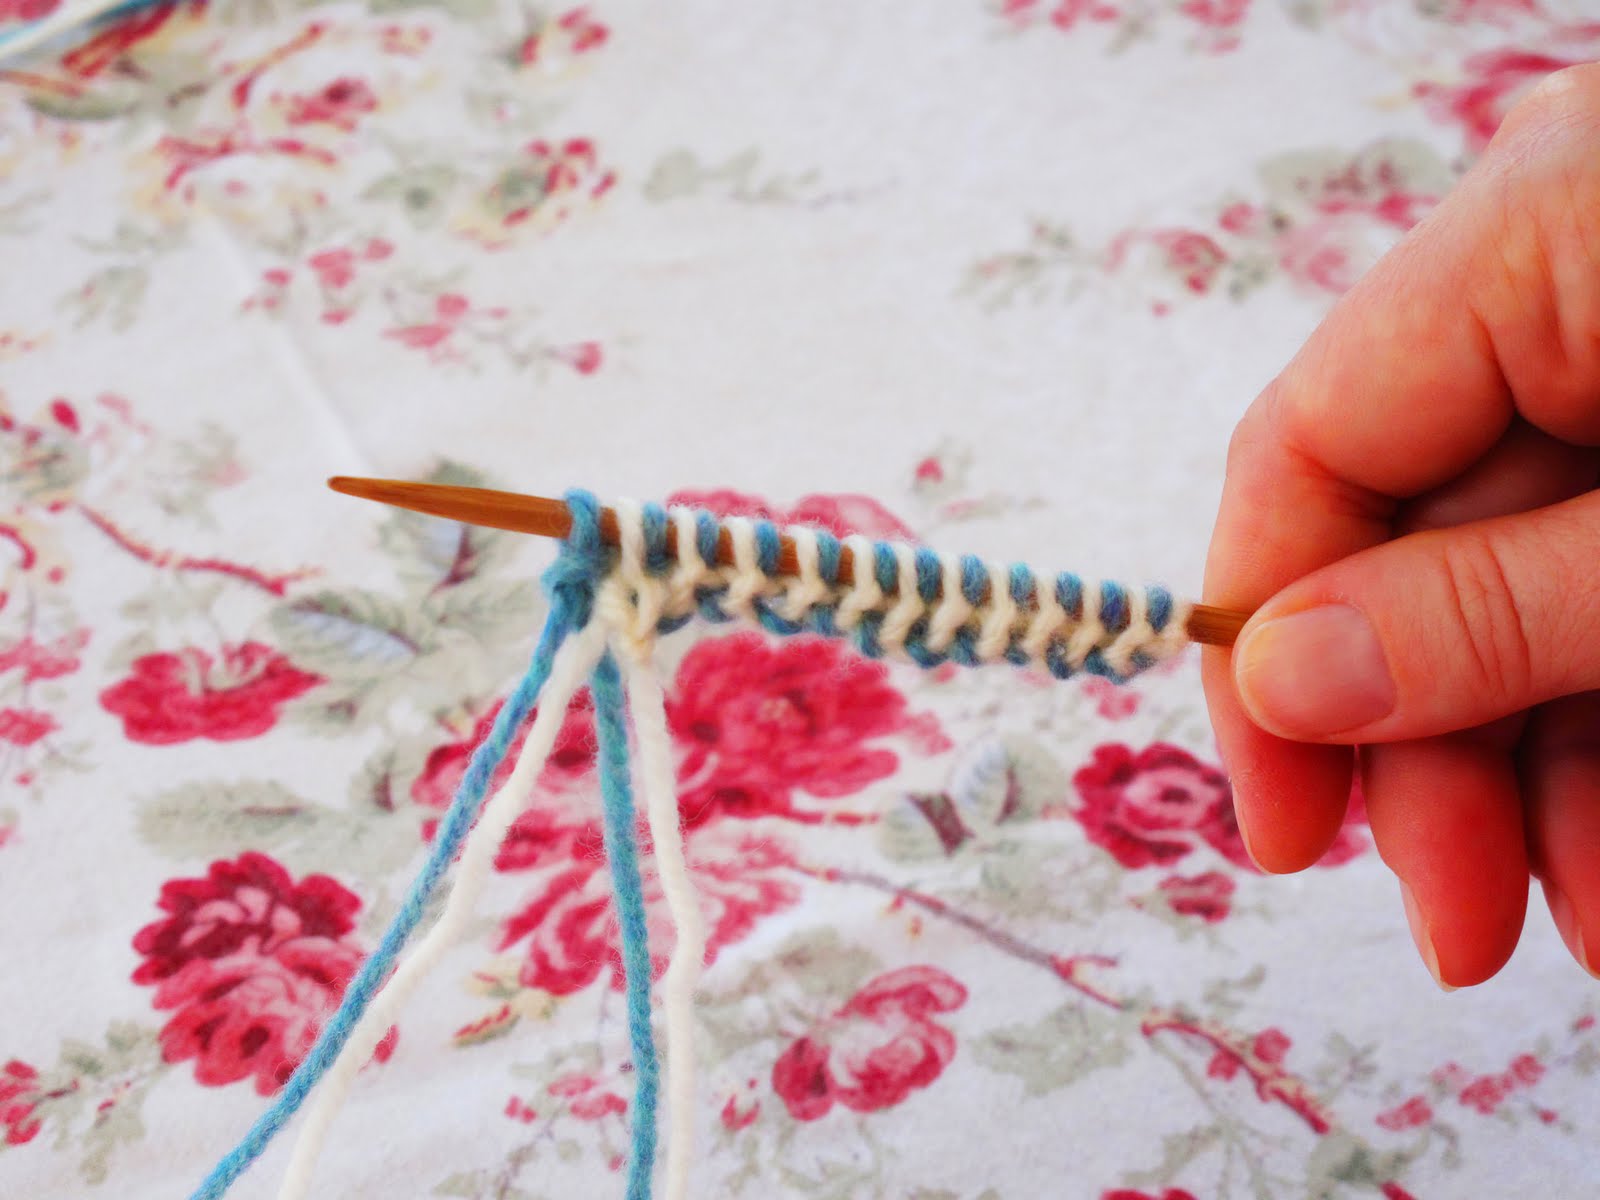
Tie on a new colour and insert your hook into the first stitch loop, yarn around hook, pull through, yarn around hook, pull through both loops on the hook. Continue to do Sc into each previously done stitch as before. Complete as many rows as you find pleasing.

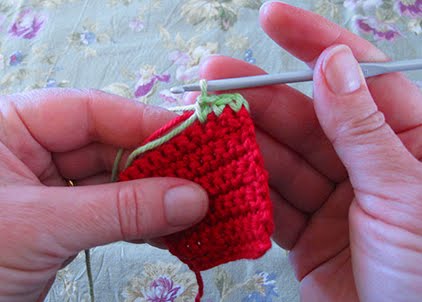
Once you have completed enough rows, again change colour, but this time join in the new colour so that you are crocheting along the edge of BOTH previous colours (see above pic). Complete as many rows as you did with the first colour change (this keeps thing sort of balanced, and will tend to keep the overall shape square).
Keep going around as you can see above, changing colours and doing as many rows as you feel look right. Work in the loose ends...

Simple, but sweet.

Off to bed for me,
Have a good evening
Lots of Love,
Heidi :)

Thursday, May 27, 2010

(Un)-happiness is...


Oh, the horror...

We are living in the Twilight Zone (possibly reality is actually worse...), all is a mess, and home has become uninhabitable (in parts :) )
Our renovations started last week, and initially we decided to do some small mainly aesthetic changes, but now we are in the throes of a full scale upheaval!
The entire roof is coming off and the lounge is being re-plastered and the floors sanded...


I have tried (with great deals of digging deep within my reserves, I might add), to be brave, calm, optimistic etc, but this week sorely tried my Herculean efforts...


I was sorting out bed linen (all pastels and white I might add), when an unimaginable noise, accompanied by screaming assailed my ears...milliseconds later, I (and needless to say, the immediate environment around me), was overtaken by a volcano sized spewing of dust, soot and goodness only know what (I tell you....if we do not all demise from the plague, after inhaling all that which lived in the roof of our house...it will be a miracle).


As can be seen in the pic above (post event evidence....after a full day of repairs being carried out), one of the workers fell through the ceiling, the poor thing...in the process grabbing onto the copper piping in the roof, to break his fall, opening up the plumbing and drenching the floor (and the items in the room , which sadly included a lot of perishables, like books...).


When I looked up from the swirling dust, the poor man was swinging from the copper pipe, water and dust raining down in what surely must be an approximation of the Chicxulub Event...
I was speechless...


So, an emergency call to a plumber, and a day later, you have what is seen above...


I kept telling myself, that this too will end, and that I must be brave and determined...(it didn't work...)

Thankfully, after a bit of a chat with Mr P. (who is a veritable fount of strength in these situations), I felt better, and (dare I say it?), even could smile a little about the incident.
It must be said that this is the second man to have fallen through the ceiling...I shall spare you the details of the previous victim's accident...suffice to say, it was caused by a great deal of stupidity and he was not hurt...

The one thing I am very excited about: the decorating that will follow ♥

I will post pics as the scene unfolds...

I hope to have a tutorial for you all tomorrow...how to crochet a Log Cabin Square!

Have a wonderful evening,
Lots of Love
Heidi :)

Tuesday, May 25, 2010

Happiness is...

Happiness is...
Spending the whole day with your baby girl...buying gorgeous fabric...enjoying lunch together...shopping for books (our favourite!), and being thankful for all the good in our lives :)

Sleep tight everyone,
Lots of Love,
Heidi :)

Monday, May 24, 2010

Double Knitting Tutorial

Hi friends!I have had no end of trouble uploading this tutorial...it has taken two days for the pics to upload, so I apologise for the delay in posting...:( Having said that, here it is (something to be said for perseverance :)) I wanted to do a tutorial on double knitting, because for a long time it was something I was puzzled by , not really understanding the online explanations that I found. I wanted to be able to knit a double layer of mitten/glove cuffs, for extra warmth, and eventually managed to work out how to do a cast on for the beginning of the glove, that didn't have a floppy unattractive edge to it. So, again, just to be clear, I didn't invent this technique, merely did it my way :)


You'll need to colours of yarn and a circular needle. I have used an aran weight yarn for this tutorial and size 4mm needles.


Firstly, make a slip knot in both yarns. Place the slip knots on the needle in such a way that the tails are "behind"and the working yarns to the front.

Holding your needle in your right hand, bring the working yarn of the colour closest to you right hand, towards you and then to your left, ie, you are bring the yarn around the other colour's slip knot, towards your left.


Hook your left thumb around this working yarn (you are going to be doing a good 'ol fashioned thumb cast on, alternating colours.


Insert the point of the needle, under the working yarn as shown above. Notice the placement of the working yarn, on your thumb.


Remove your thumb, and gently pull on the working yarn, to form your second blue stitch.


Now do exactly the same for the white yarn, coming off the white slip knot...holding the white working yarn in your left hand, bring it towards you and around the your left, slip your left thumb under it, and insert your needle in exactly the same way you just did for the blue yarn. You have cast on the second white stitch. Repeat again using the white yarn. Then the blue, alternating colours and each time bringing the yarns around each other to the front as explained.
Your stitches so far should look like the pic above.


Continue to do this until you have the required number of stitches. Here a small aside: lets say you are casting on to make a small square (a potholder for eg), and you need a total number of 25 stitches if you were just knitting straight back and forth...in double knitting you are creating exctly the same thing, but it has two sides, so in order to make the same item as in the regular knitting, you will need to cast on 25 stitches in the white as well as 25 stitches in the blue yarn (think of two separately made potholders, placed wrong sides together and sewn up all around...that is essentially what double knitting does). Now it's all good and well when you have two different coloured yarns...you can see the front and the back of the work developing...but if you have one colour of yarn, you may easily get confused...so if you have never done any double knitting before, I recommend that you start with two colours until you are feeling more confident with the technique. Once you have the hang of it, you will "see" which type of stitch comes next, just as you would "see" if the next stitch is a purl or a knit stitch in regular knitting.


Ok, now for the way to hold your yarns...
Through trial and error, I have found the following way to be the best for me.
Note which colour yarn you have cast on last...this will obviously be the colour you will first knit. This is important later, but for now, wrap the yarns around your little finger, as shown above. it is essentially the same way I wrap the yarn for regular knitting.


Now insert your middle finger between the yarn as above, making sure that you have brought the yarn that is the second colour you are going to knit (in this case the blue yarn is the second stitch on my needle), to the front of your finger.


Using your index finger, hook the white yarn (which forms the first stitch you are going to knit on your needles), and slip your index finger between the yarn (white now in front). This may seem over complicated and may well be uncomfortable for you, but I have found that it controls my knitting tension perfectly. You will have to experiment and see what works for you.


Initially you may find the whole "holding"thing a bit tricky...I initially hold my right needle in you left hand, just held by my thumb, in order to have it in the right vicinty for taking in my right hand (once you have your yarns placed well in your right hand, how else do you grab your right needle??) Once my yarns are wrapped around my fingers, I just "pass" over the needle from left hand to right...
You are ready to knit your first stitch...in this case the white...


Insert your needle into the first stitch. As you can see in the pic above, I tend to stabilize my right needle in my left hand so it doesn't flop about.


Bring your right hand up, and wrap the white yarn only, around the needle point exactly as for a regular knit stitch. Knit the stitch.


So now you are left with the knitted white stitch on your right hand needle and both yarns behind this needle. You need to purl the blue stitch on the left hand needle, so you bring BOTH yarns to the front exactly as if you were doing a regular purl stitch.


Once both your yarns are on this side of the work, you will insert your needle as if to purl, but use ONLY the blue yarn to purl the stitch.


After you have purled the blue stitch, you will take both yarns to the far side of the needles, and again using only the white yarn, knit the next stitch on the left hand needle.


Repeat the steps: both yarns to the front , insert needle as to do a purl stitch, use blue yarn only to purl, both yarns to the back .


One row completed.


Turn your work around. Before you start to knit twist the yarns around each other once, I find this makes a nicer edge.


Notice that you will need to knit the first stitch (blue), because on the previous row, you purled it, so in order to end up with an item that has knit sides showing only (ie the purled stitches all show inwards), you will need to purl the blue stitches and knit the white ones.


Looks so pretty, love this technique!

Just continue in the same way, bringing yarns back and forth...

If anything is unclear, please send me a mail and I shall clarify!

This has been a marathon uploading session (our internet in SA isn't always perfect), so I shall sign off...

Have a great evening :)
Lots of Love,
Heidi :)